
Making DNS and A Reverse Proxy Work Together
What is a reverse proxy anyway?
Ever since I started home-labbing, one thing that always annoyed me was typing the IP and the port number to access a certain service.
Can’t we have a nice and memorable way to access each service?
One approach is to create local DNS entries, i.e., map the MAC address of your server to a static IP. However, this only solves the IP problem, as I would still have to enter the port number. The ideal solution would be something like DNS subdomains. Let’s look at an example
video.site.comshould point to a video service running onsite.commsg.site.comshould point to a messaging platform running on the samesite.com
No port or IP address in sight.
Since I am a novice in web-technologies, I relied on some trusty DuckDuckGoing to eventually figure out that what I’m looking for is a reverse proxy. After browsing Lemmy and Reddit, I understood that the Caddy reverse proxy is a favorite in the home-labbing community.
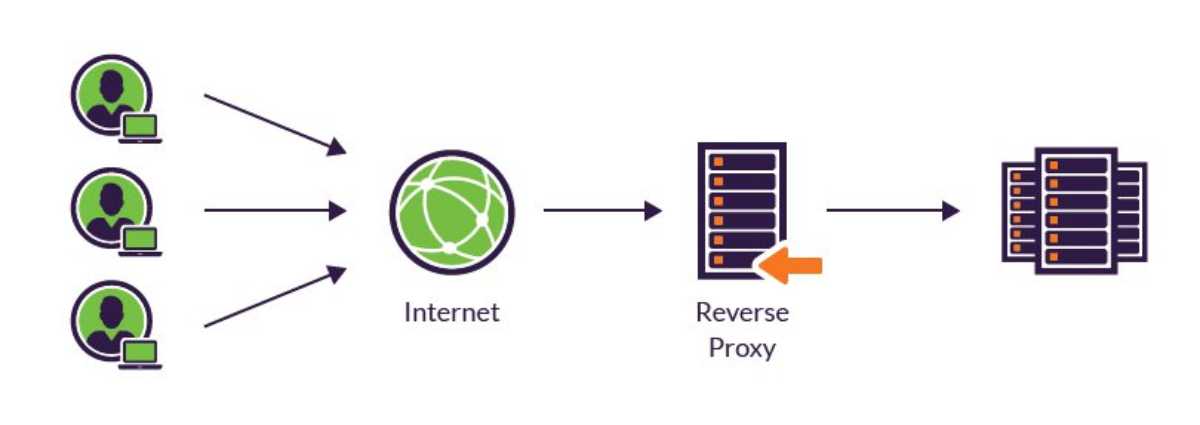
What does a reverse proxy do? (An oversimplified explanation)
Say there are two services running at 192.168.1.10 at ports 8081 and 8091.
You have Caddy setup as a reverse proxy on the same server.
By looking at the incoming request, Caddy will forward it to correct service running at the appropriate port.
Advantages of a reverse proxy:
- You don’t have to remember the port number of each service
- You don’t have to setup HTTPS certificates for each service
Caddy can do a lot more (create access rules for the services) and there are nice resources on those. This guide will only discuss the reverse proxy aspect.
<rant>
However, I could not figure out how to use Caddy for HTTP services. Like I said before, I’m a novice, so I had a hard time understanding the guides present online. While everyone was praising Caddy being the easiest way to setup a reverse proxy, I was literally tearing whatever hair I had on my head to figure out Caddy. The reason is every guide was only talking about public facing HTTPS services.
</rant>
Let me simplify what I learnt about setting up Caddy.
- You need to have a router with a configurable DNS service or deploy your own DNS service, such as PiHole or Technitium.
- Depending on whether you need HTTPS or not, the Caddy syntax will be slightly different.
- If you need HTTPS locally, you don’t need to buy a domain.
- The reverse-proxy doesn’t even need to be on the same server where your services are, but having them colocated will save you a lot of network resources.
Let’s try to setup Caddy for two services.
Note: This guide is more suitable for those who want a reverse proxy setup inside their local network. If you want to expose your services to the public internet, this guide is not for you as there are a lot of other security considerations. Most guides online are for running services publicly.
Step 1 : Creating some local DNS entries
Your request must first reach the server which is hosting your services, and for that, the URL must initially point to your server.
Thus, we need to create some local DNS entries.
Before we begin, ensure that your server has a static IP, say 192.168.1.10.
- Create a local DNS entry on your router where
192.168.1.10is mapped toserver.lan. - This step is optional but you can use
dnsmasqfor mapping a wildcard entry to the IP. It allows you to map all subdomains to a single IP (Eg.*.server.lan -> 192.168.1.10) Since I use Pihole for my local DNS entries, you can check this guide on how to usednsmasq.- Open your Pihole main page
- Navigate to
System Settings->All Settings->Miscellaneous->misc.dnsmasq_lines - Create an entry like this
address=/server.lan/192.168.1.10 - If you don’t want to use
dnsmasq, you need to add a DNS entry for every service your launch. Exampleserver.lan,192.168.1.10 sv1.server.lan,192.168.1.10 sv2.server.lan,192.168.1.10
Now personally, I hate writing the same config details multiple times in multiple places. I prefer the concept of “single source of truth” as it saves a lot of time during debugging
With this, you are done from the networking side.
Step 2 : Setting up Caddy
You can now decide whether you want to enable HTTPS or use plain HTTP. I have shown both the options.
<rant>
Ideally, we should use HTTPS always. But I asked myself “What’s the real danger of not using HTTP for my homelab?” Yes, there are some dangers.

If someone broke my wireless password and started a network sniffer, they can capture the password eventually and use it to…watch movies hosted on my Jellyfin server
Practically speaking, there is no danger. You can use HTTP as long as the traffic is all internal AND you trust all devices running on your network. I initially started on HTTP but I eventually shifted to HTTPS mainly because of constant nagging from the community. However, I’ll show both the configs variants. But if it’s not too much of a hassle, just use HTTPS. Also, certain Android front-ends don’t like to connect to a service via HTTPS, so it’s worth knowning both.
</rant>
Once decided, you need to create a Caddyfile which declares which subdomain is mapped to which IP and port.
As per the service description mentioned previously, this is what the Caddyfile should look like:
With HTTPS
{
    local_certs
}

sv1.server.lan {
    reverse_proxy 192.168.1.10:8081
}

sv2.server.lan {
    reverse_proxy 192.168.1.10:8091
}
The first section about local_certs tells Caddy to create a local certificate and all the services below should use it.
Note: You might be tempted to use the domain name inside each section to avoid writing IP addresses but alas, it doesn’t work. If I find time, I’ll investigate this.
With HTTP
http://sv1.server.lan {
    reverse_proxy 192.168.1.10:8081
}

http://sv2.server.lan {
    reverse_proxy 192.168.1.10:8091
}
Note the inclusion of http in front of the URL. Apparently Caddy assumes it’s HTTPS if the protocol is not mentioned in front. I hate implicit knowledge.
Other points to note
If you are using Docker/Podman to run your services, including Caddy, you don’t need to modify your docker-compose.yml for running a reverse proxy server; Caddy should handle it.
Caddy runs on port 80 and 443, so any service running on those ports needs to be migrated to other ports.
Step 3 : Running The Pihole Web-interface On Non-standard Ports
Note: If you do not run a Pihole on the same machine as the Caddy service, you can avoid this section.
Caddy needs to be running on 80 and 443, but I have a Pihole on the same machine which uses the same ports as Caddy. Thus, Pihole needs to be moved to another set of ports (I’ve chosen 8080 and 1443). Note that the DNS service needs to run on 53 and that cannot be changed.
This part of the process was a bit confusing for me since the there has been a change in variables in Pihole, and the existing documentation/blogs/guides on the internet uses the old variables.
You have to make two changes you have to make. I’m assuming you are using Docker/docker-compose.
Declare the internal ports
Pihole uses FTLCONF_* variables to configure a lot of deep settings. Using those, you need to set the internal webserver port.
...
    environment:
      - FTLCONF_webserver_port: '80,443os,[::]:80,[::]:443os'
...
Map the external ports to the internal ports
You need specify which external ports on the host will point to the internal ports mentioned above. So it should look like this
...
    ports:
      - 53:53/tcp
      - 53:53/udp
      - 8080:80/tcp
      - 1443:443/tcp
...
Both these sections should be present for the web-server to work on a non-standard port. With this, if you deploy your Pihole, it should start working at your preferred ports. So you have Caddy running on ports 80 and 443 and the Pihole web interface running on port 8080.
Step 4 : Start Caddy
You need to run Caddy. I used docker-compose.
services:
  caddy:
    image: caddy
    container_name: caddy
    restart: unless-stopped
    ports:
      - 80:80
      - 443:443
      - 443:443/udp
    volumes:
      - ./data:/data
      - ./config:/config
      - ./Caddyfile:/etc/caddy/Caddyfile:ro
Start the compose file
docker compose up
What does it look like finally?
Let me give a overview of how this architecture handle requests to your internal services.
- So you generate a web request
https://sv1.server.lanfrom your phone connected to your home network (say). - Your phone uses Pihole to resolve the URL
sv1.server.lanfrom the web request. - The Pihole returns the corresponding IP for the URL, which is
192.168.1.10 - Your phone then forwards the web request to
192.168.1.10at port443.httpsrequests are forwarded to port443by default. - Caddy checks the header of the web request and sees
sv1.server.lanand sees that there exists a mapping in theCaddyfile - The request is forwarded as per the mapping.
With this, I hope you have a better understanding of how Caddy and DNS work together.
Note: I wouldn’t have been able to make Caddy work with HTTP without the help of my friend 🐱.